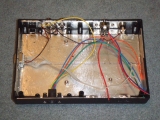
This will be the second generation of my DTV conversion. I used an identical jiffy box on my original NTSC DTV (click here to see that one) I am making this one a little better using some of the things I learned on the first one. Some new features of this one is an internal RF shield and two different audio-outputs. One is a regular RCA output and the other one is a 1/8" phone jack so that if I wanted to connect a pair of computer speakers to it, I could. The DB-9 connector on the side is not a joystick port. It is, in fact, a user-port. The hummer-DTV doesn't appear to have joystick ports readily available. I may eventually be able to use a joystick in that port as I'm planning to reprogram some old games to use the memory address of the user-port instead of the joy ports. I also didn't use the plastic PC-Power Supply connector on this one. I thought I would like that on my first one, but it was to difficult to insert and remove. So on this new one, I used a regular barrel DC power jack.
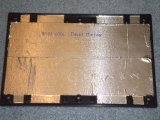 |
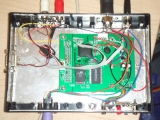
I also put aluminum tape on the inside of the lid. |
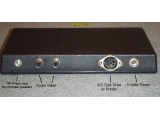 |
This is a rear-view showing the various ports on the back. |
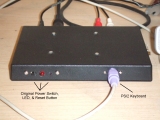 |
Here is the completed front of the unit. Here you have the power switch, LED, and reset hole (use a paperclip) and the PS/2 keyboard port. |
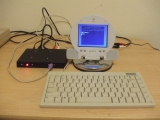 |
Here is the finished setup. You can see my 1581 disk drive just over to the left, almost out of sight. I'm still using a 5" home-made sony Playstation monitor for the time being. |
 |
After flashing the kernal to rid the need of the resistors on the user-port, I finished wiring up the user-port to the 9-pin DSUB on the side. |
Mistakes and Brainfarts - Yes, I realized a few mistakes at the last minute. The worst mistake was removing the wires for the keyboard and IEC that I had originally inserted through the tiny holes and soldered. I wanted to use new wires but I discovered that once removed, it was darned near impossible to ever push another wire through those holes. I tried desoldering wick but it would never remove the solder deep in the holes. The holes were so tiny it was extreemly frustrating. It took an hour to get 3 wires back down in those holes and the other 2 I just eventually gave up and soldered them to the top of the board so they are a weak connection but now it shouldn't matter. My advice to you is if you ever solder wires in those holes, don't remove them.
Another thing I didn't realize. I had conveniently soldered the ground on all the ports together (video, audio, IEC, keyboard, user-port, main power, etc) but I later discovered that the ground for the audio/video is actually not directly linked to the rest of the grounds. So I had to re-wire that. I also had to cut a small slice in the aluminum tape I had used for RF shielding to keep the two grounds seperate.
Final words - First I will say that the shielding I put around the box made a big difference. I had been fighting a mild, wavy interference pattern on the screen the entire time. I wasn't sure the shielding would help, but it did. The picture is now crisp and clear as can be! It looks as good as a real C64 in composite mode. Even better than my V1 DTV that I did last year.And of course the Luma-fix made a big difference too. I never did the chroma fix, as the colors look fine the way they are and I knew that would be a big job moving those extra resistors. I did have that extra luma-correcting resistor connected (680 ohm that goes to ground) but removed it. It was causing too much noise on the audio line and the improvement was only about 10% better. So I took the clear audio over the better luma seperation.
So far I have only connected user port pins 0-2. Those are the only ones I've used so far in my experiments. I'm exhausted from this project so I wanted to get it finished. If I need the other user-port lines later, I'll go add them. Maybe by that time I can patch the kernel not to look at those lines.
I also really like the speaker jack I made. I took the opportunity to hook up the speaker system for my Pentium-4 desktop computer, which includes a subwoofer, to the DTV and play some SID music. I still say the original C64 sounds better, but it still sounded pretty good.
